User report by Dr. Alexandre Franco
During my professional life as a dentist, I have frequently seen patients with one single dark tooth in my practice. Being so common, I wondered which dentist would not be familiar with these situations? Usually, our first thought is that we are facing a non-vital tooth, one which had already been treated endodontically. Consequently, it would be suitable to go ahead with an appropriate whitening protocol for non-vital teeth in order to get rid of the dark internal coloration – it could not be easier, could it?
Nevertheless, in certain cases, X-ray images and vitality tests reveal surprisingly different circumstances. For example, the following case:
Recently, a female patient in her 30s visited my practice. She generally revealed impeccable oral health as well as consistent, thorough dental hygiene. However, there was one noteworthy thing she complained about: her anterior tooth 2.2 showed a significant dark coloration (Image 1).
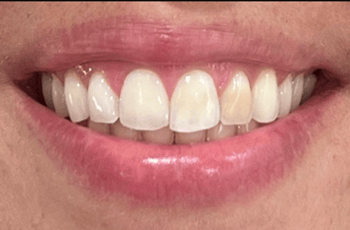
Image 1: Initial situation before the whitening treatment
As mentioned above, my first thought was that the tooth was non-vital due to some previous endodontic treatment and that we could easily solve the problem with a whitening treatment for non-vital teeth. However, after a thorough examination via X-ray (Image 2) and vitality tests it became obvious that the tooth was still alive, and responding very well to the thermal vitality test. It was also noticeable that there were no signs of any access cavity on the palatal side of the tooth. I wondered if the reason for the discoloration was trauma, and asked the patient about the history behind her dark tooth.
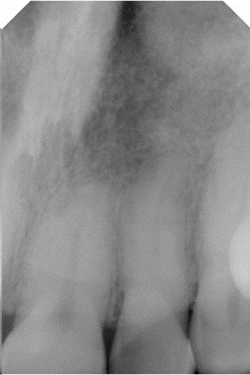
Image 2: X-ray - proof of tooth vitality
The origin of this issue was based on one of her passionate hobbies. The patient was an active kickboxer some years ago. Practicing her sport regularly, an incident occurred approximately 10 years ago. Her opponent knocked her out, punching her face and hitting the tooth. As a result of this trauma, the tooth became dark.
At this point, it was definitely worth considering the details of this case more precisely. The decisive factor was what happened to the tooth after that punch, respectively the traumatic experience. The tooth did not only get a darker colour superficially. It turned out that the interior of the tooth had a dystrophic calcification in response to the trauma and caused the unpleasant discoloration. This is an internal change that takes place within the inorganic part of the tooth, and can be perceived by a closer analysis with an X-ray.
My patient, and particularly myself, were looking for a natural and ideally non-invasive procedure. Therefore, before any restorative technique, I recommended a tooth whitening treatment. Although this kind of case can sometimes be more challenging to whiten, the advantages of a whitening treatment are obvious: a tooth whitening treatment preserves the natural tooth structure completely and requires only a simple non-invasive procedure.
Before the whitening treatment we performed a dental hygiene cleaning, following a common ultrasound scaling protocol in combination with a prophylaxis paste.
The initial tooth colour determination for this particular tooth (2.2) resulted in an A3.
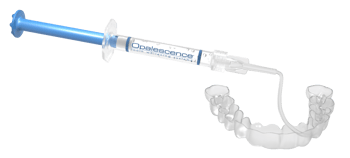
At first, I decided to use a whitening gel with a low concentration – so I could get an idea of how challenging this case would be. My method of choice was Opalescence™ PF 16% carbamide peroxide gel (Ultradent Products) and the corresponding individual whitening tray.
After creating the individual tray, I explained to the patient how to care for the tray and use the whitening gel. The patient was told to use the gel ONLY in the corresponding space of the affected tooth (2.2), which was marked with a pen. We also showed the patient how to easily fill that particular space with Opalescence PF gel, directly from the convenient syringe. Due to its sticky, viscous formulation, the whitening gel adapts to the teeth and does not run out of the trays, ensuring a safe whitening treatment.
After these initial instructions in our practice, the patient continued the whitening treatment comfortably at home. She was advised to repeat the treatment for four hours per day over a period of 15 days.
When she visited my practice after 15 days for a check-up, we compared the tooth colour again, which resulted in a wonderful B1 shade (Images 3 + 4). My patient was overwhelmed to see this amazing outcome, considering the low effort which had been undertaken. She said the treatment was very pleasant and uncomplicated. Plus, she especially appreciated the opportunity to wear the trays anywhere and at any time without being bothered by them.
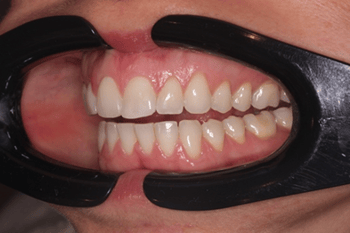
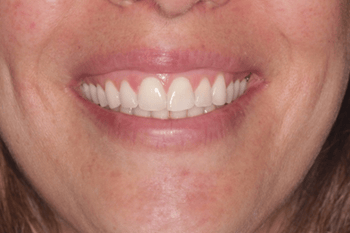
Images 3 & 4: Final result after the whitening treatment
From my point of view, I was more than delighted to see that my careful, non-invasive approach was so successful.
As mentioned above, my strategy behind the use of a whitening gel with a lower concentration was to apply the gentlest, yet least invasive treatment protocol possible. This decision was an important part of my diagnosis and allowed me to see what results could be achieved with the lower concentrated gel. The advantage was that this treatment still left all other options open. If the results were not what I was looking for, I easily could have continued the treatment, maybe even with more invasive restorative techniques.
In this case, I was pleased that no other measurements were required!
About the User:
 Dr. Alexandre Franco
* Private Practice in Figueira da Foz, Portugal
* Post-graduated in Orthodontics (Brazil)
* Post-graduated in Implantology (Brazil)
* Master in Oral Medicine (Portugal)


