
 USA
USA Australia
 Brazil
 China
China Croatia
 France
 Germany
 Italy
Italy Japan
Japan Latin America
 Netherlands
 Spain
Spain Turkey


By Dr. Mark Pettit, DDS
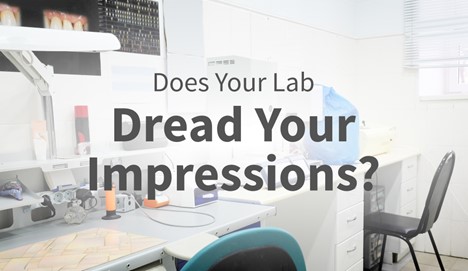
Call me paranoid, but I don’t think I’m alone in having wondered what the dental lab I use thinks of my dentistry. Sure, dental labs deal with things like poor retentive preps, illegible finish lines (margins), pulls in the impression, different viscosity impression materials that aren’t properly blended, insufficient reduction, and inaccurate bites on a daily basis. The real question is, does the lab dread, or love seeing your impressions come through their door?
 A little background: I have a favorite local lab. I’ve tried the big labs in the bigger cities, and they’ve done some great work for me, but I consistently love the results from the smaller lab in town. They pick up my cases at my office, and oftentimes send them back early. They’ll help me with custom shading if needed, and even rush a case when I’ve overextended myself.
A few years ago, I had a tough case to send to the lab. It had a deep subgingival finish line on a tooth that fractured just a little too deep. It wasn’t quite enough to resort to crown lengthening with a periodontist, but it was close. I decided to handle it with traditional crown and bridge dentistry. While the impression looked good, I knew the lab may have trouble finding the finish line in the impression. I’m a big believer in owning my own work, so on my day off, I drove to the lab with my loupes, a blade, and a red pencil to trim the die myself to avoid having to write out complicated instructions.
It probably took me 20 minutes to trim the die and I felt confident about the final result. However, I had some time to kill, so I offered to help them trim the dies from a few other cases they had on their hands. These weren’t my impressions and I was quickly humbled by how difficult I found it to locate the finish line on an unfamiliar impression. That experience made me realize we don’t give our labs enough credit for what they do to transform our sometimes mediocre work into high quality crowns.
So, I decided to come up with a few tips for other dentists on how to make your lab rave about you, versus dread your cases.
Shortcuts Won’t Cut Your Time
As a teenager, I worked in an incredible little bike shop in Silicon Valley. My boss—a former Olympian—exhibited exceptional patience in teaching a bunch of teenage kids how to service bikes and help customers. As a teenager, naturally, we always looked for shortcuts to do our work faster. As a result, it was there I learned one of my greatest life lessons: The long way is actually the fastest way.
There really are no shortcuts. I’ve learned that trying to rush something usually results in poor quality or having to start over. Taking shortcuts at the bike shop always led to longer repair times because I had to do it over until it was right. The same principle holds true for dentistry. Sure, we can be more efficient with some things, but more often, there are certain steps that must be followed to get quality results. Or, you’ll find yourself starting over and wasting precious time.
- Take the time to place your finish line where you know it needs to be.
- Break the contact, protect the adjacent teeth, and create a finish line that can be seen.
- Place that buildup if needed for proper retention.
- Reduce the prep enough that the lab can give you some anatomy but do not over reduce the tooth into a nub.
In the end, following these steps meticulously pays off in time and quality.
Get in Control (of Bleeding)
Before packing cord, taking an impression, or fabricating a provisional, remember these words, “Get in control.” Dr. Dan Fischer, founder of Ultradent Products, Inc., has taught this for years. It is absolutely imperative to get tissue bleeding and other fluids under control before moving on to any procedure in dentistry. If not, your impressions and final product will be lacklustre, everytime.
To do this, I love using one of Ultadent’s four hemostatic solutions. My favorite is Astringedent™ X hemostatic, which is made up of an iron solution that stops bleeding in seconds. A coagulum forms when used correctly. It works like a charm.
 Astringedent™ X hemostatic
However, the operative words are “when used correctly,” when it comes to getting results. Don’t just apply the hemostatic. Per the product instructions, the solution requires scrubbing it with adequate pressure into the sulcus. The product needs to reach the capillaries and form temporary cork-like plugs to do its job. I like using Ultradent’s specially designed yellow Metal Dento-Infusor™ tip for making sure the Astrigedent X hemostatic solution really gets into the patient’s tissues and sulcus. Test your work with a vigorous spray of water to see if you need to continue scrubbing the solution into the tissues. If they still bleed, scrub and retest until the bleeding is completely under control. This is so critical before moving on to retraction.
Retraction
I’m a retraction cord guy. I learned to use it in dental school, and it works great for me. Sure, I’ve tried paste retraction and I own a diode laser. But for most cases I use cord for retraction.
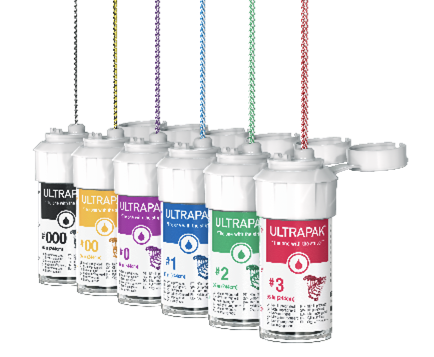 Ultradent’s Ultrapak™ cord line
Ultrapak™ cord is different from other cords I’ve used on the market. It’s neither twisted nor braided. It’s knitted. The knitted structure gives it some unique benefits no other cords offer. For example, when I push it into place, it stays in place. With other cords I’ve used, I’ll push it into one area, but when I go to push it into the next area, the first area slips back out, causing a lot of unnecessary frustration.
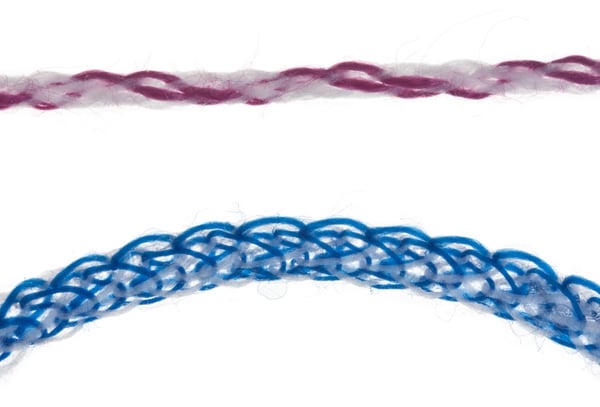 A standard braided cord (top) versus Ultradent’s Ultrapak™ knitted retraction cord
With Ultrapak™ cord, I press my cord packer into it, and it doesn’t slip through or around the cord, (as happens so often with braided and twisted cords), meaning less injury potential to the gingival tissue. The knitted cord forms a hollow tube, soaking up and holding hemostatic solutions better. It also places gentle pressure on the sulcus to retract the tissue for a far better impression.
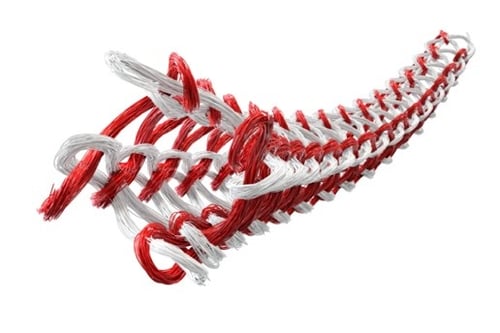 An illustration of the tube-like shape Ultradent’s Ultrapack knitted retraction cord takes
I like to double-pack my retraction cord in many cases. I use a smaller cord (like the Ultrapak 000 size cord) for going into the sulcus first. Then, I place a larger cord (Ultrapak retraction cord comes in six sizes) over it for ideal retraction. I always use a longer cord than I think I’ll need to compensate for retraction. I can pack the cord dry, or sometimes, I soak it in the hemostatic solution before packing. If I’ve stopped all bleeding thoroughly prior to packing the cord, I rarely cause rebleeding when removing the cord.
This is why I never rely on just the cord alone to stop bleeding—if you are counting on cord to stop the bleeding by itself, then when its removed, it regularly pulls the little coagulation plugs with it, forcing me to repeat the hemostasis and retraction process all over again. It is critical to control bleeding prior to placing the cord. If cord is places properly and bleeding is controlled prior to placement, removing cord should not cause bleeding to re-occur.
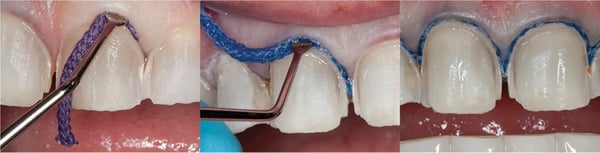 The double retraction cord method described by Dr. Pettit
Also, make sure to use a quality cord packing instrument. The Fischer’s Ultrapak™ Packers retraction instruments work great in my hands. They’re just thin enough, and have tiny serrations to hold and pack the cord. I like the smaller head because it’s more delicate and offers better control. Conversely, interproximal composite instruments can be thin and even a little sharp. Slipping off the cord into the sulcus can cause some tissue injury that I would rather avoid.
 Fischer’s Ultrapak™ Packers
Conclusion
Of course, taking great care and using the best products and techniques when performing prep design, tissue management, and retraction is first and foremost, what’s right for the patient (and your patient google reviews!). But there’s an added benefit to all of this painstaking detailed work: a great relationship with your dental lab. If you’re unsure of what your lab thinks of your work or where you could improve, I suggest simply asking. The answer may be difficult to hear, but I guarantee you’ll learn something. And here’s the bonus: everyone wins!
Thank you, Donna, Freddie, and Aubrey, at my lab for consistently making my cases look so great. I couldn’t do it without you.
Dr. Mark Pettit

Dr. Pettit graduated from Creighton University’s dental school in 1994. He currently runs and owns a small private practice in Salt Lake City where he works with his wife, who manages the office.Together, they’ve raised three sons, who are all attending college.
Having grown up in Northern California, Dr. Pettit now calls Utah home. He loves roadbiking in the warmer months, and for many years, worked part-time every ski season at one of Utah’s world-famous resorts for a hobby as a side gig. In addition to practicing dentisty, Dr. Pettit also works as a consultant and researcher at Ultradent Products, Inc., in their clinical affairs department.