
 USA
USA Australia
 Brazil
 China
China Croatia
 France
 Germany
 Italy
Italy Japan
Japan Latin America
 Netherlands
 Spain
Spain Turkey


User report by Jacques Nicolas Grebowiec
Minimally invasive and aesthetic dentistry is becoming increasingly important —especially in the anterior region. Healthy, white teeth play a key role in self-esteem and social acceptance of patients. Considering this, the discoloration of one or more teeth in the frontal region becomes particularly noticeable and may have a psychological impact on the patient.
Endodontic treatment is primarily dedicated to the preservation of teeth and their function. As a consequence, discoloration or darkening may occur due to numerous reasons which results in an aesthetic impairment.
In the anterior region this becomes particularly important, therefore a holistic endodontic approach is the treatment of choice. This includes a state-of-the-art endodontic treatment/retreatment and an adequate restoration under consideration of function and aesthetics.
The aesthetics of endodontically treated and discoloured teeth may be restored with veneers or crowns. These indirect restorations, however, require extensive preparations, which in turn result in loss of natural tooth substance. Alternatively, a composite restoration combined with internal tooth whitening — also known as "walking bleach method”— should be considered.
This approach comprises the application of an oxygen releasing whitening gel directly into the discoloured coronal pulp chamber. An oxidation process is initiated that gradually splits the pigments resulting in a brighter appearance of the tooth substance.
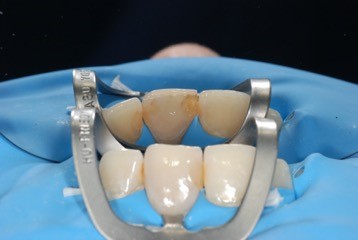
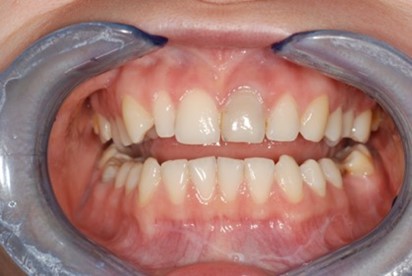
This procedure is illustrated in the case of a 27-year-old female patient. The nerve of tooth 21 was non-vital and additionally diagnosed with a chronic apical periodontitis, which has been treated endodontically. As part of the root canal treatment the previously treating dentist had informed the patient about the option of internal tooth whitening. Nevertheless, the patient declined at that time.
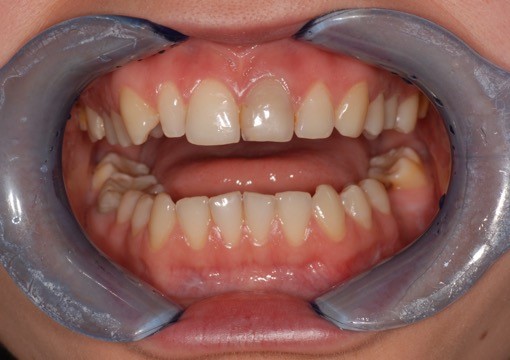
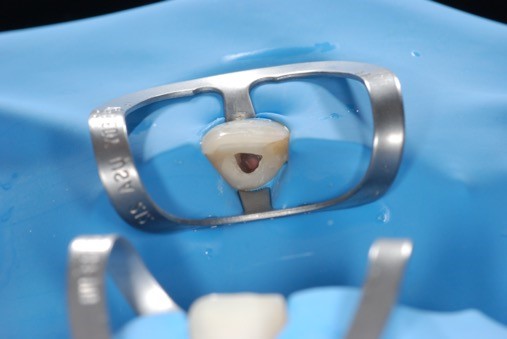
Initial situation: Endodontically treated, internal discoloured tooth 21
Being dissatisfied with the aesthetic outcome after all, she presented herself in my practice several months later. Initially, the patient’s expectations were assessed, and the procedure and possibilities of internal tooth whitening were explained.
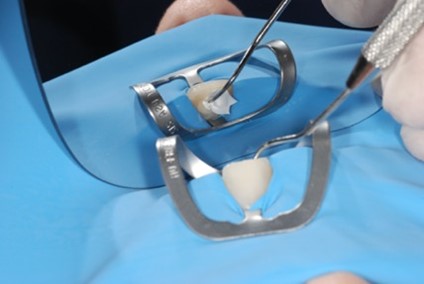
In preparation for the walking bleach method, a rubber dam was placed, and the access cavity was reopened. All restorative and root sealing material was removed from the coronal pulp chamber and 2 - 3 mm below the healthy gingiva. The cavity was cleaned thoroughly in order not to compromise the whitening result. After the cleaning procedure, the enamel was etched circularly around the access cavity with 37% phosphoric acid in order to provide retention for the temporary filling. Next, in order to promote an efficient cervical barrier, the root canal obturation and surrounded dentin was etched, a bonding agent Peak™ Universal Bond adhesive was applied following the manufacturer instructions and a 2 mm thick layer of flowable composite was placed.
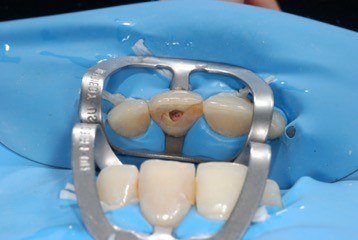
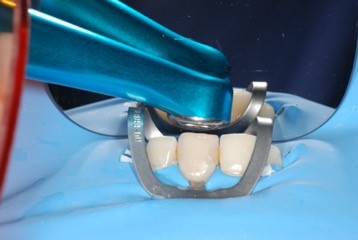

Opening of the access cavity and removal of the restorative and root sealing material from the coronal pulp chamber and 2 - 3 mm below the healthy gingiva. Afterwards, root canal sealing with a 2 mm thick layer of flowable composite.
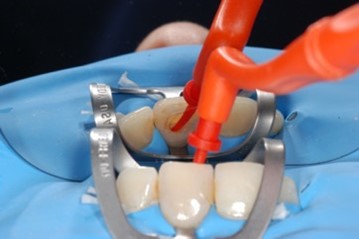
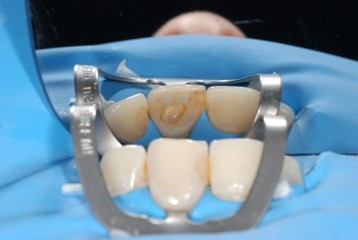
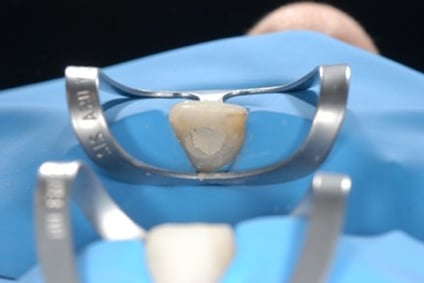
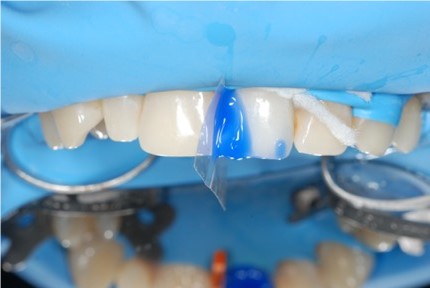
Then the whitening gel Opalescence™ Endo, Ultradent Products, Inc., was applied into the coronal pulp chamber.
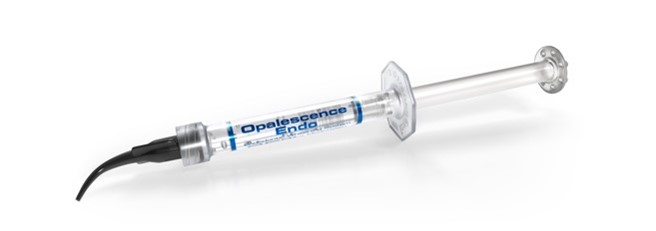
Opalescence™ Endo whitening gel was expressed into the coronal pulp chamber, filling the open canal space up to 2/3 to accommodate the provisional restoration.
Opalescence Endo whitening gel contains 35% hydrogen peroxide and is available in convenient ready-to-use syringes. A suitable Black MiniTM tip or a Micro 20 ga tip, which is attached onto the syringe, allows for a quick and targeted application of the whitening gel. This results in greater accuracy and reduces waste of material making the use very cost-effective. It is important to place a small cotton pellet over the whitening gel to verify that no whitening agent stays on the margins of the access cavity in order to ensure a good temporary seal. Also, users should leave enough space (1.0 - 1.5 mm) to accommodate the provisional restoration. Finally, the cavity was provisionally sealed with a flowable composite. Following the same protocol, this procedure should be repeated every 1 to 5 days until the desired colour change is achieved or no further benefit is noticed.
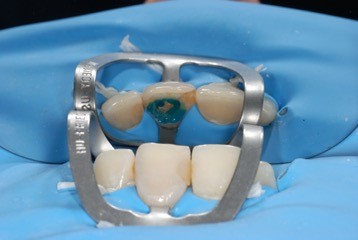
In the present case, the desired whitening effect was achieved after eight days. The provisional restorative material and the Opalescence Endo whitening gel were removed. After thorough rinsing and cleaning of the access cavity, a new temporary restoration was placed.
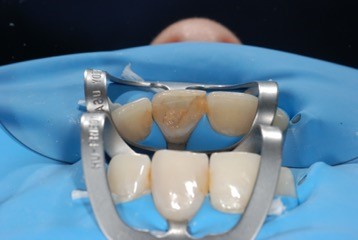
As whitening materials may interfere with bonding agents, we observed the result for an additional seven days. This transition period also helped to see whether the tooth needed any further whitening. However, it turned out to be unnecessary as the tooth colour remained stable. Thus, the permanent filling was built with Peak™ Universal Bond adhesive and Mosaic™ universal composite A2/A3 — following a multi-layering concept. The filling was finally polymerized with the VALO™ Cordless LED curing light (all products from Ultradent Products, Inc.).
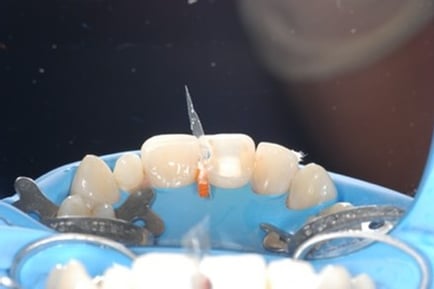
Light curing of the temporary restoration with VALO™ Cordless LED curing light
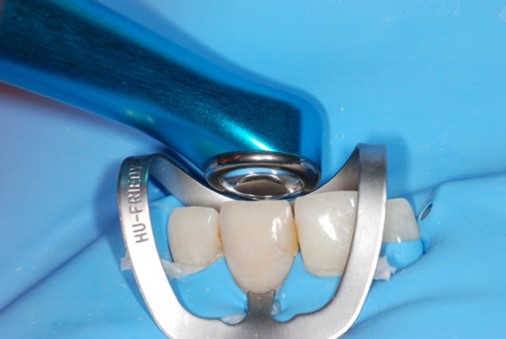
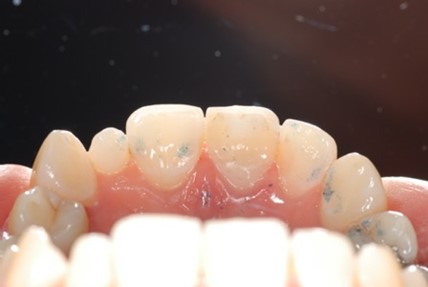
Temporary restoration after whitening period
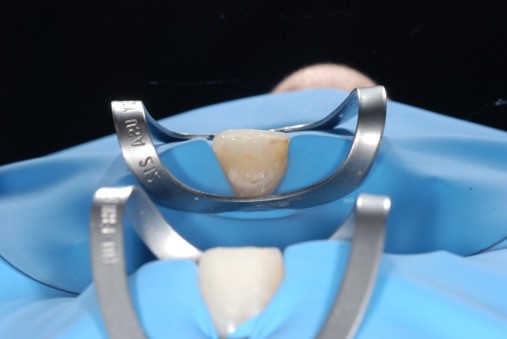
Coronal seal and pulp chamber after whitening
Temporary restoration after whitening for 7 days
Removal of old composite and preparation for final restoration
Final composite restoration with MosaicTM universal composite
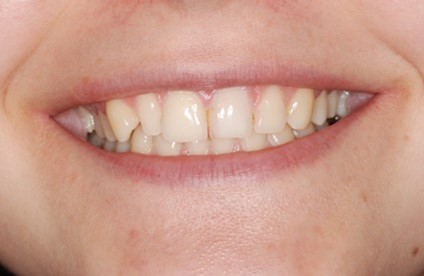
Before / after whitening (before new restoration)
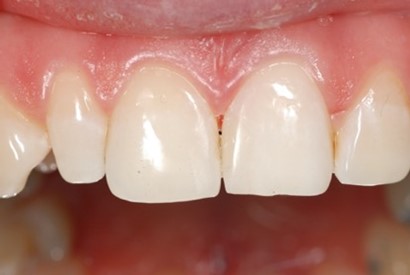
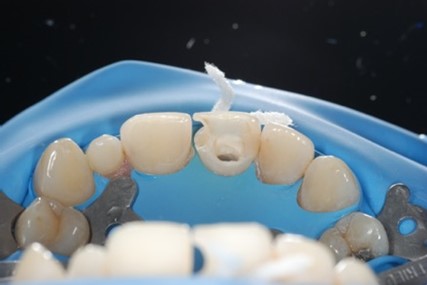
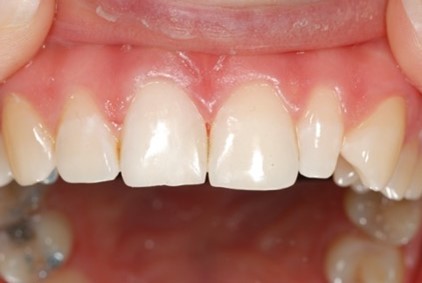
Final result with final restoration
During the two follow-up sessions — the first at seven days and the second after two months — a satisfying result was observed. The patient was extremely happy to be able to laugh again.
In this case the internal tooth whitening was better suited than a veneer or a crown, following a minimally invasive approach in order to save as much healthy tooth substance as possible.
Opalescence Endo whitening gel is viscous and dimensionally stable, which makes it easy to handle. Additionally, the use of syringes enables a precise and uncomplicated application reducing the required chair time to a minimum.
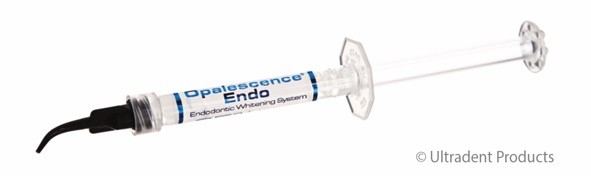
OpalescenceTM Endo whitening gel (Ultradent Products, Inc.) in a ready-to-use syringe
With the aid of Opalescence Endo, the procedure can be smoothly integrated into everyday practice, as it does not require any preparation or premixing of substances. Its benefits are generally well understood and accepted by the patients.
Opalescence Endo whitening gel is mostly used for anterior teeth — case selection, however, depends on the condition of the tooth in question. If the tooth to be treated was open over a long period or the discoloration is too prominent, crowns or veneers might result in better aesthetics. In an effort to mimic nature, indirect restorations tend to be translucent to various degrees, which might constitute a problem if the prepared tooth is discoloured. Therefore, Opalescence Endo whitening gel may be used to whiten the stump before insertion of the final restorations.
In summary, internal tooth whitening with Opalescence Endo whitening gel is a very simple, painless and cost-effective method to overcome loss in aesthetics.
About Jacques Nicolas Grebowiec

Study of dentistry in Riga, Latvia
Employed dentist since 2015
Training in endodontics and microscope-assisted endodontics
Since 2017 Curriculum Endodontics