
 USA
USA Australia
 Brazil
 China
China Croatia
 France
 Germany
 Italy
Italy Japan
Japan Latin America
 Netherlands
 Spain
Spain Turkey


Introduction
The evolution of modern composite systems has enabled clinicians to obtain increasingly efficient results from both an aesthetic as well as a functional point of view.
In fact, the introduction of filler particles of different sizes has improved the performance of composites, allowing the combination of ideal aesthetic results due to high biomechanical composite material characteristics and the adhesive tooth restoration complex.
Important progress has also been made from an optical point of view. At the beginning, only opaque composites in a single shade colour existed. Today different colours, opacities and translucencies are available. With these elements, almost every clinical situation can be reproduced.
The possibility of using a universal composite system allows dealing with virtually all clinical situations requiring a direct adhesive treatment. A universal composite system includes:
- Different colours (therefore different shades, frequently related to the VITA scale: A, B, C and D)
- Different chromas of the same colours (therefore different degrees of saturation, for example, A1-A4)
- Opaque masses
- Highly translucent masses
- Enamel masses with different colours and different intensities (brightness)
The freedom of choice of several masses from a comprehensive composite system provides a better predictability in most clinical situations, both in the anterior and posterior regions.
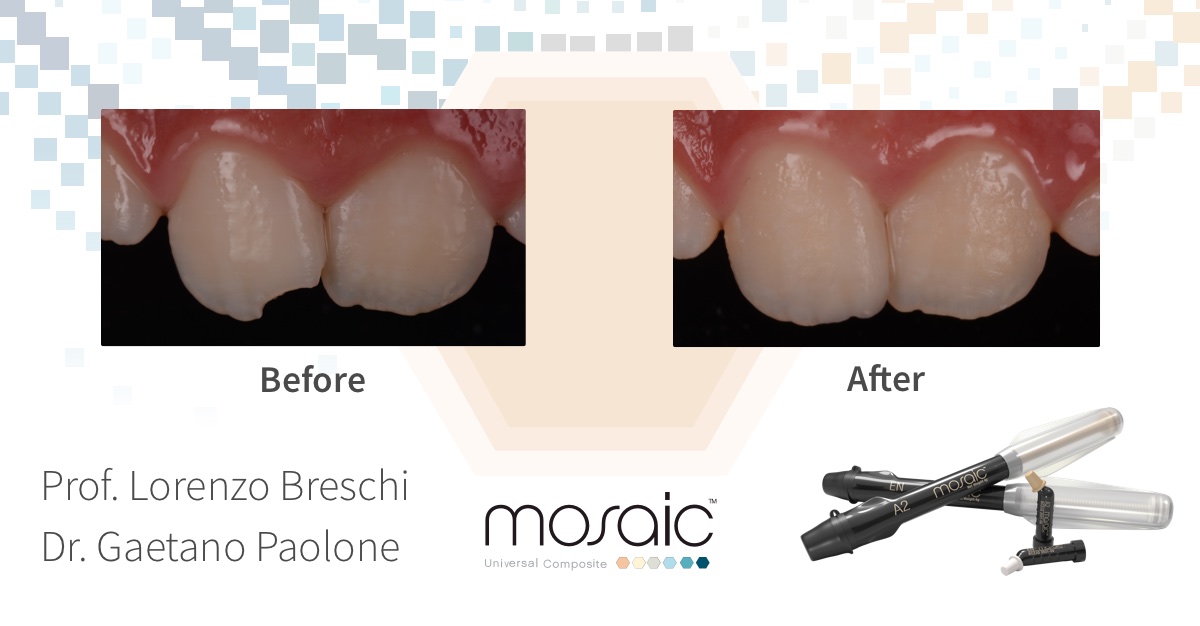
The two clinical cases described in this article show differences in terms of structure, dimensions and aesthetic requirements. They were treated with a specific selection of materials included in a universal composite system (MosaicTM composite, Ultradent Products). The first case presents a young patient with a post-traumatic situation in the anterior area (Figures 1-5). The second case describes various posterior teeth, treated in a single session (Figures 6-19).
First clinical case
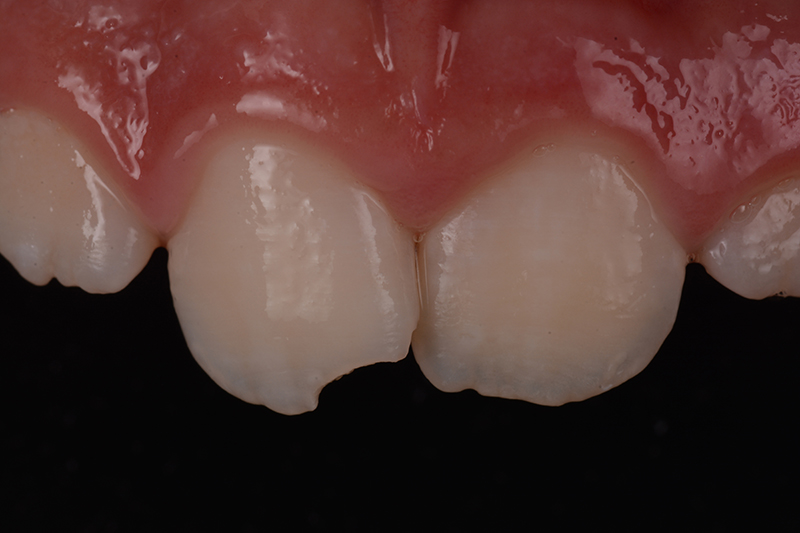
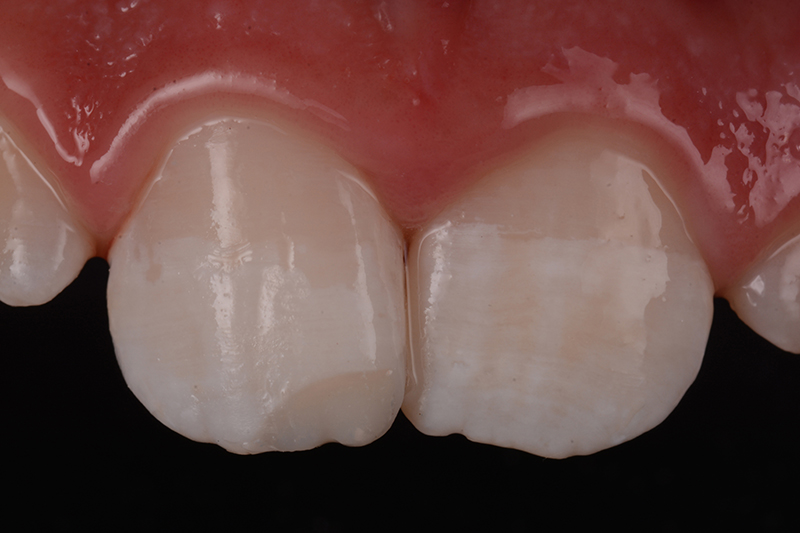
The patient presented himself in the practice with a trauma and a fracture in 1.1 (Fig. 1). Unfortunately, the broken fragment was not available and thus, a direct composite restoration was done.
During the aesthetic analysis of the fractured tooth and its contralateral, the opacities and translucencies were evaluated (Figure 2). For cases like this, it is recommended to use a composite system with different colours (A, B, C, D), different degrees of saturation and shades of distinctive intensities (high and low).
The colour scheme of this case included a dentin body A with a low degree of saturation (Mosaic A1 Dentin composite, Ultradent Products) - both for the dentin body as well as for the incisal edge (which with 0.3-0.5 mm was showing a certain degree of opacity). Additionally, an enamel mass (Mosaic EW - Enamel White composite) was used, which is typical for the patient’s age.
It is impossible to achieve a classical isolation from premolar to premolar. Subsequently, a band retention was created by etching an enamel "track" at the passage between the middle and the coronal third of the tooth. Additionally, a bonding agent was used prior to the application of the composite (Figure 3a).
At this retention, a clamp for a rubber dam could be attached. After the isolation, the margin of the tooth was prepared in a minimally-invasive way in order not to lose too much tooth structure (Figure 3a).
Next, the adhesion was achieved next by etching and rinsing with 35% phosphoric acid (Ultra-EtchTM etchant, Ultradent Products) - 30 seconds on the enamel and 15 seconds on the dentin (Figure 3b).
After gentle rinsing, a universal bond system with chlorhexidine (PeakTM Universal Bond adhesive, Ultradent Products) was applied for 20 seconds. It was evaporated afterwards and then the composite could be polymerized (20 seconds with the VALOTMcuring light, Ultradent Products, Fig. 3a).
The relatively small back wall of the restoration was sculpted manually (Mosaic EW - Enamel White composite), without using matrices or silicone masks (Fig. 3c). The dentin body (Mosaic A1 composite) was formed, leaving space for the translucencies identified before the actual initiation of the treatment (Fig 3d).
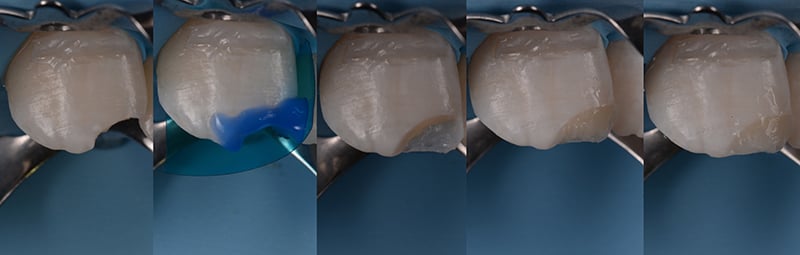 Fig. 3a-e: a) Isolation of the working area, b) Etching with phosphoric acid, c) Palatinal part (enamel mass), d) Dentin body, e) Surface layer (enamel mass)
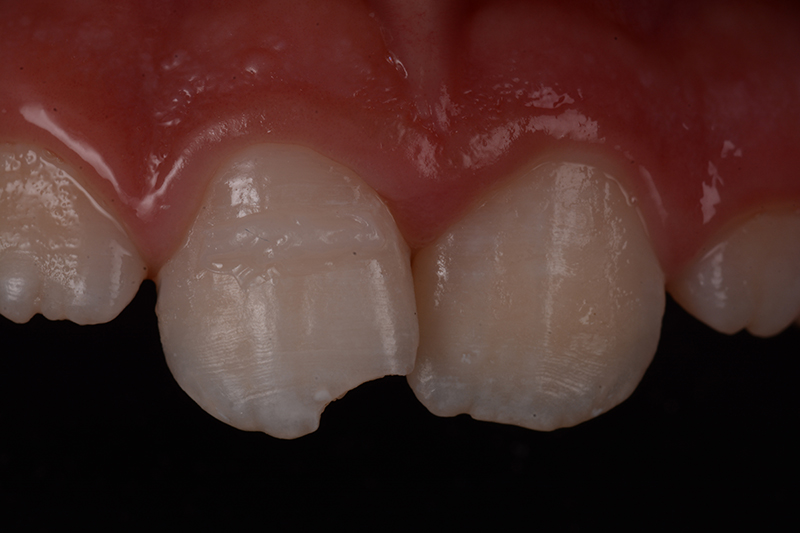
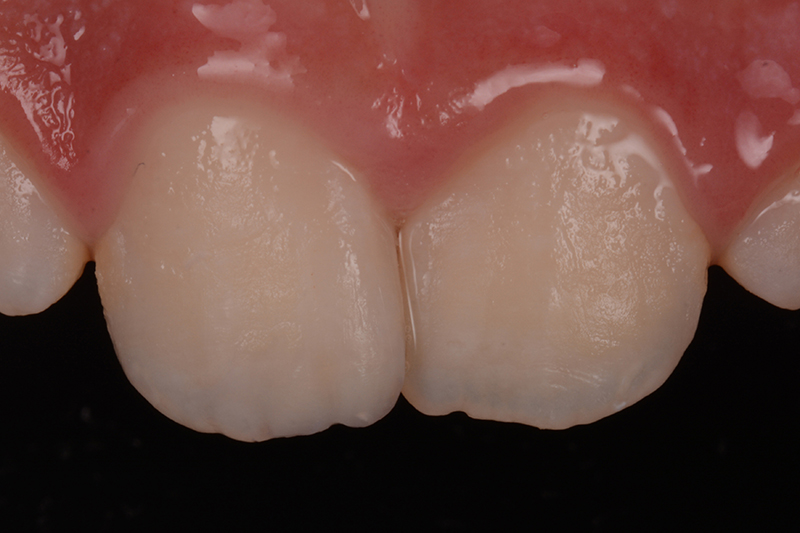
A final enamel layer (Mosaic EW - Enamel White composite) was applied on the surface, no thicker than 0.3 - 0.5 mm (Fig. 3e). The surface was finished and polished with diamond discs and polishers with gradually decreasing grain (JiffyTM Polishers, Ultradent Products, Fig 4).
One month after the treatment, the perfect aesthetic integration of the restoration became visible (Fig 5).
Second Clinical Case
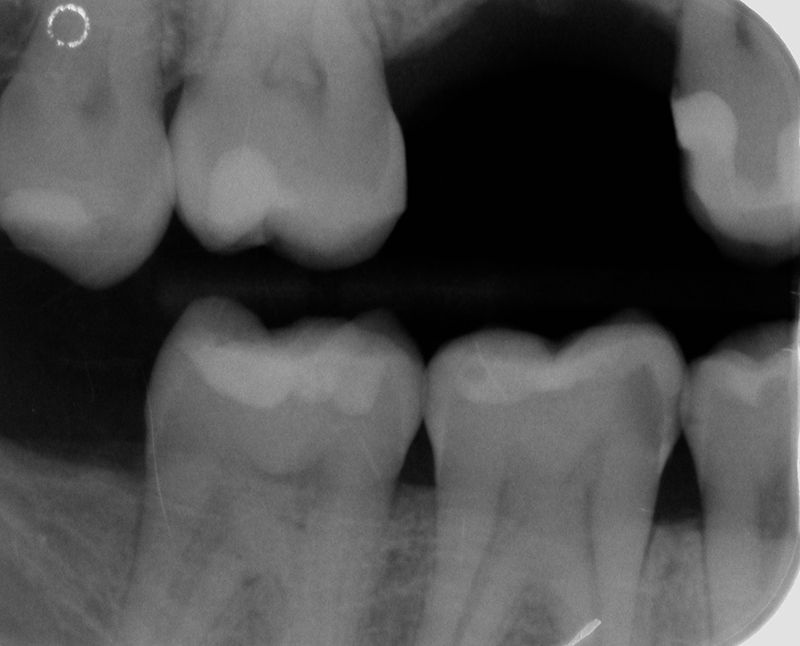
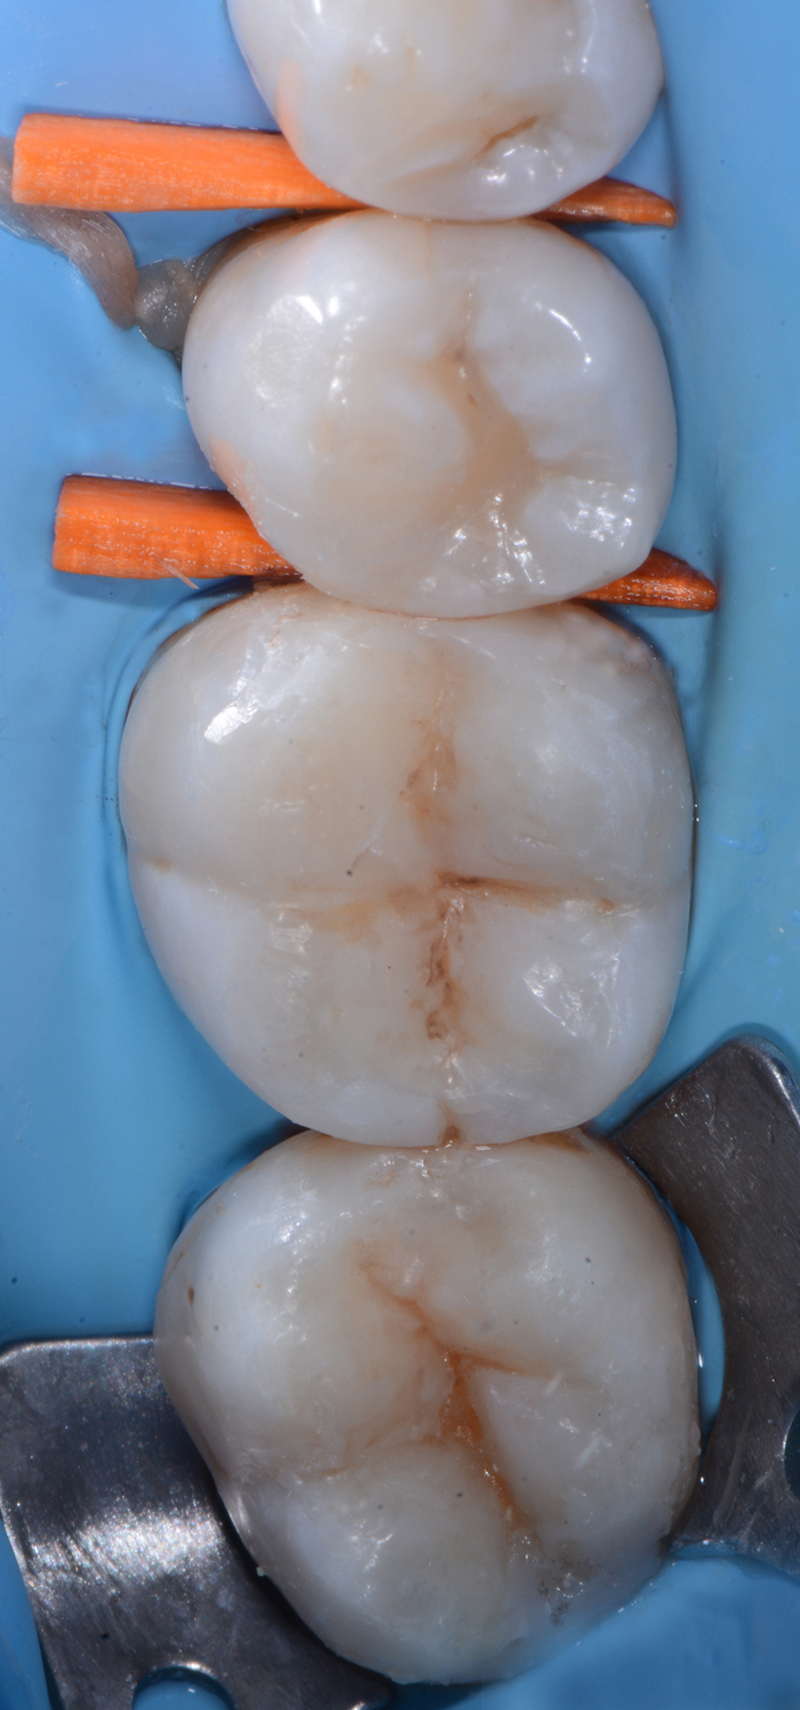
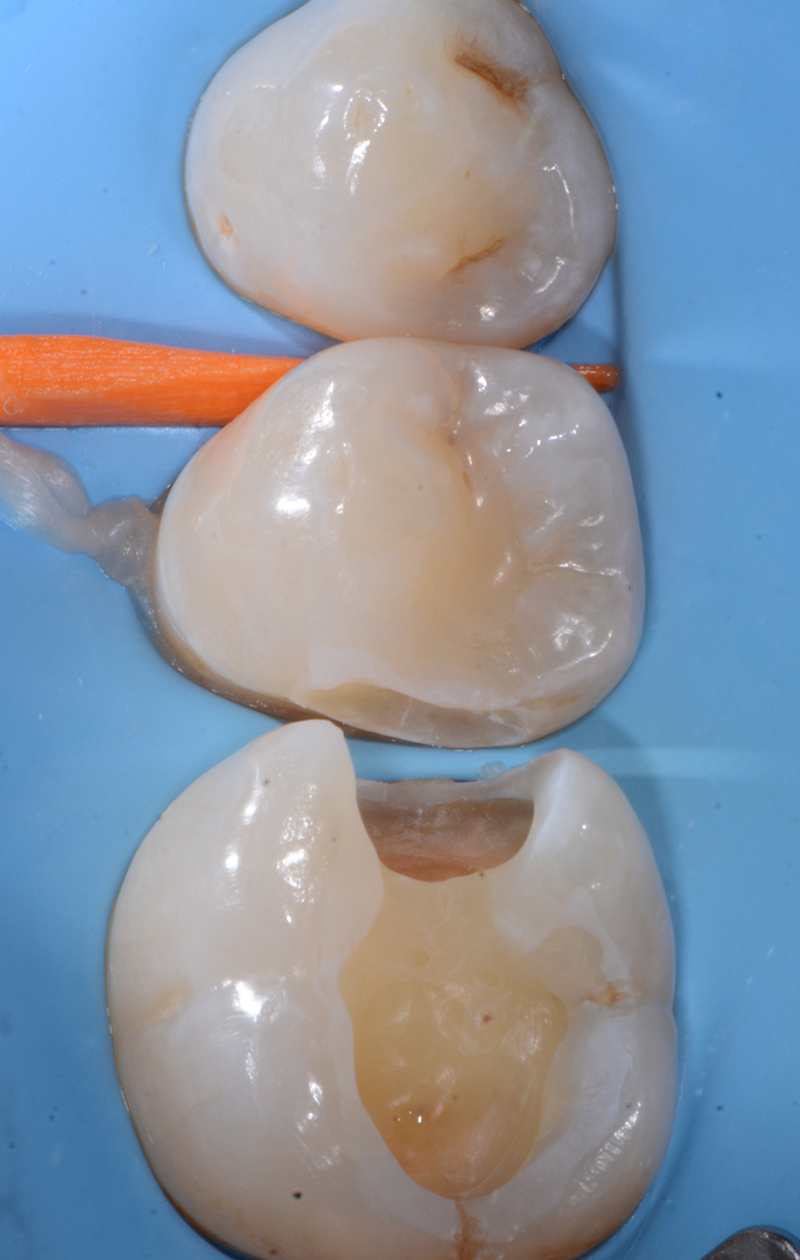
The second case relates to a 32-year-old patient who presented himself with various carious lesions in quadrant 4. These were clearly shown by intraoral radiographs (Figures 6 and 7). In particular, a mesial carious lesion was observed on 4.5, as well as mesial and distal lesions on 4.6. A restoration with marginal pigmentation already existed on 4.7.
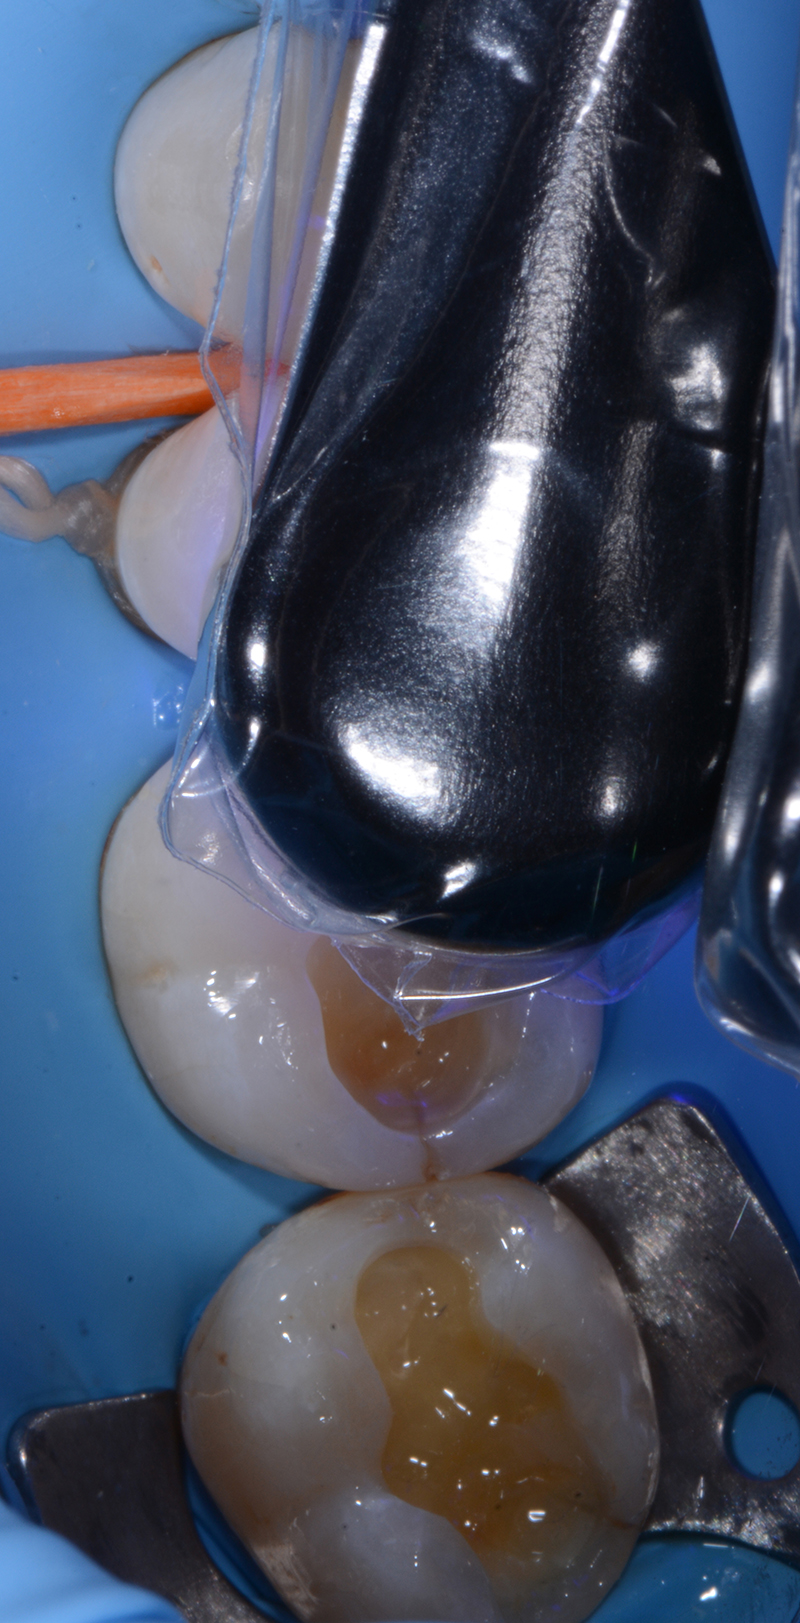
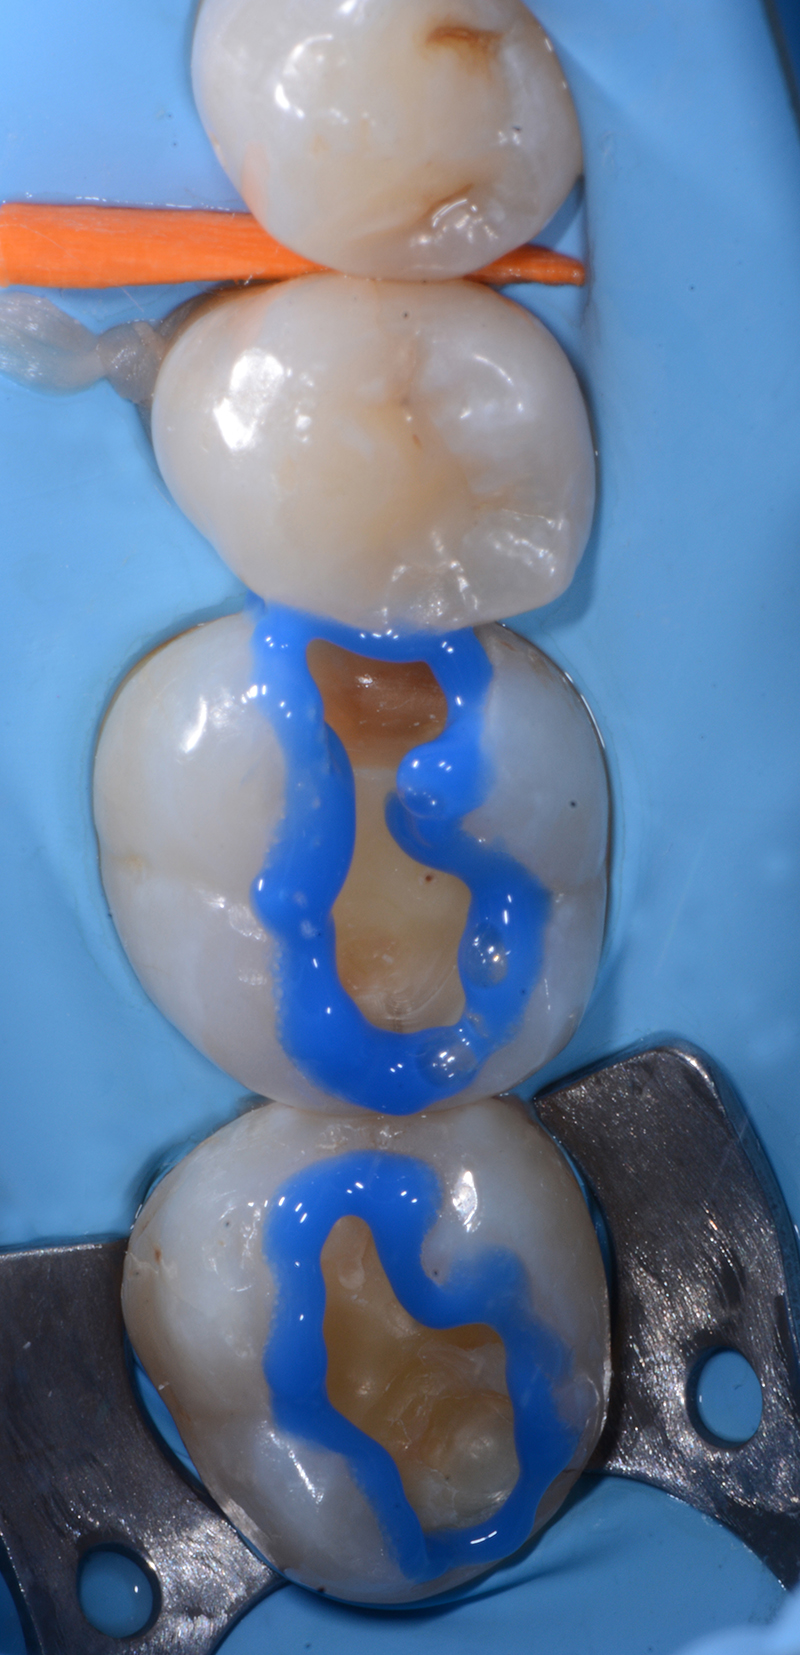
After appropriate isolation of the working field with a rubber dam, a mesio-occlusal distal cavity was opened on 4.6 (Fig. 8).
The mesial cavity of 4.6 also allowed the construction of a "tunnel" cavity (with no marginal involvement) of the 4.5 distal surfaces and with apparent preservation of the tooth substance of the affected premolar (Fig. 9).
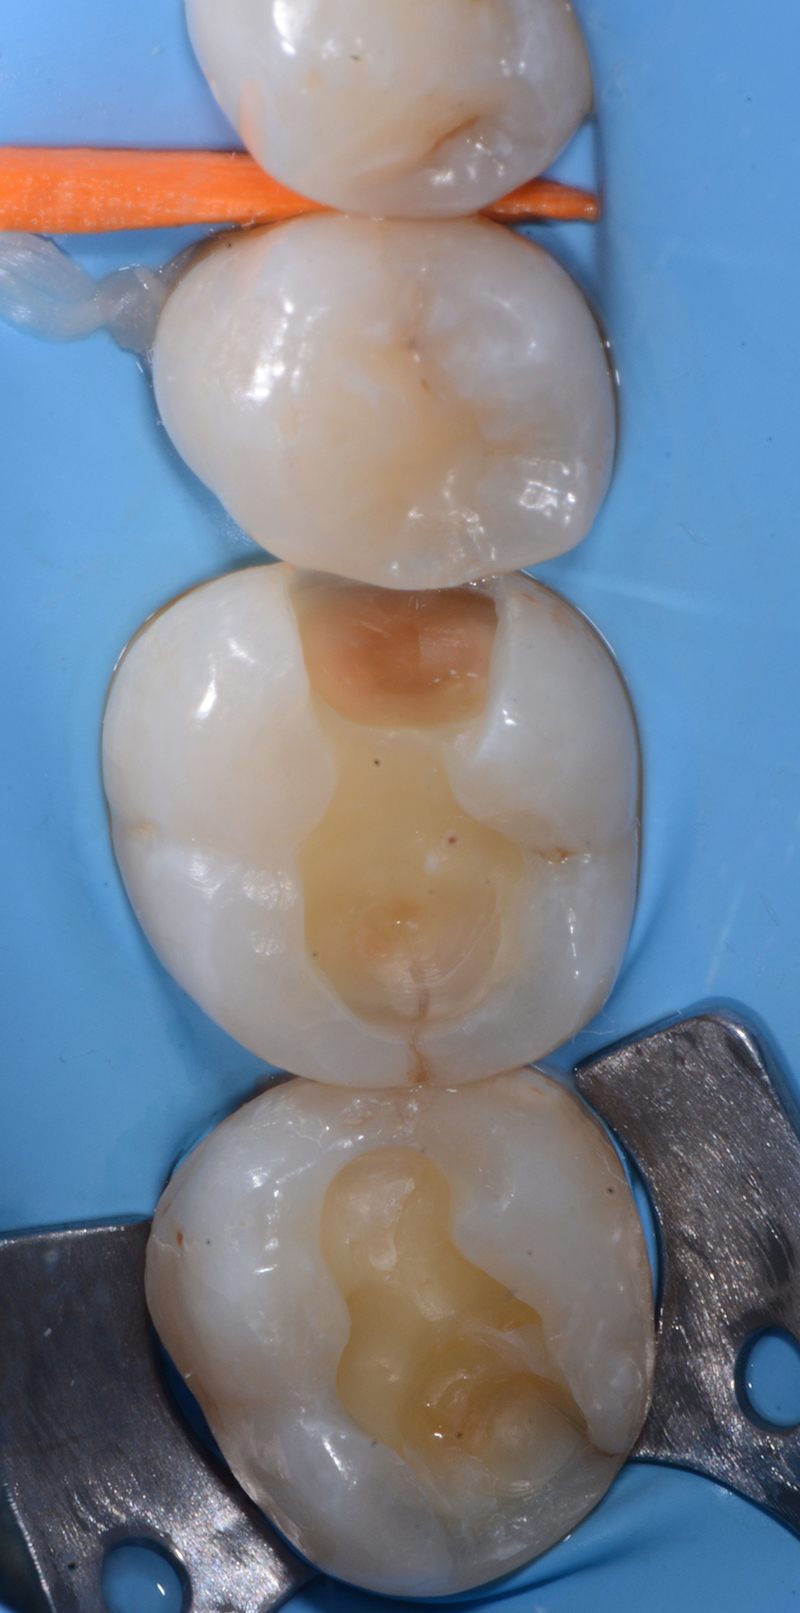
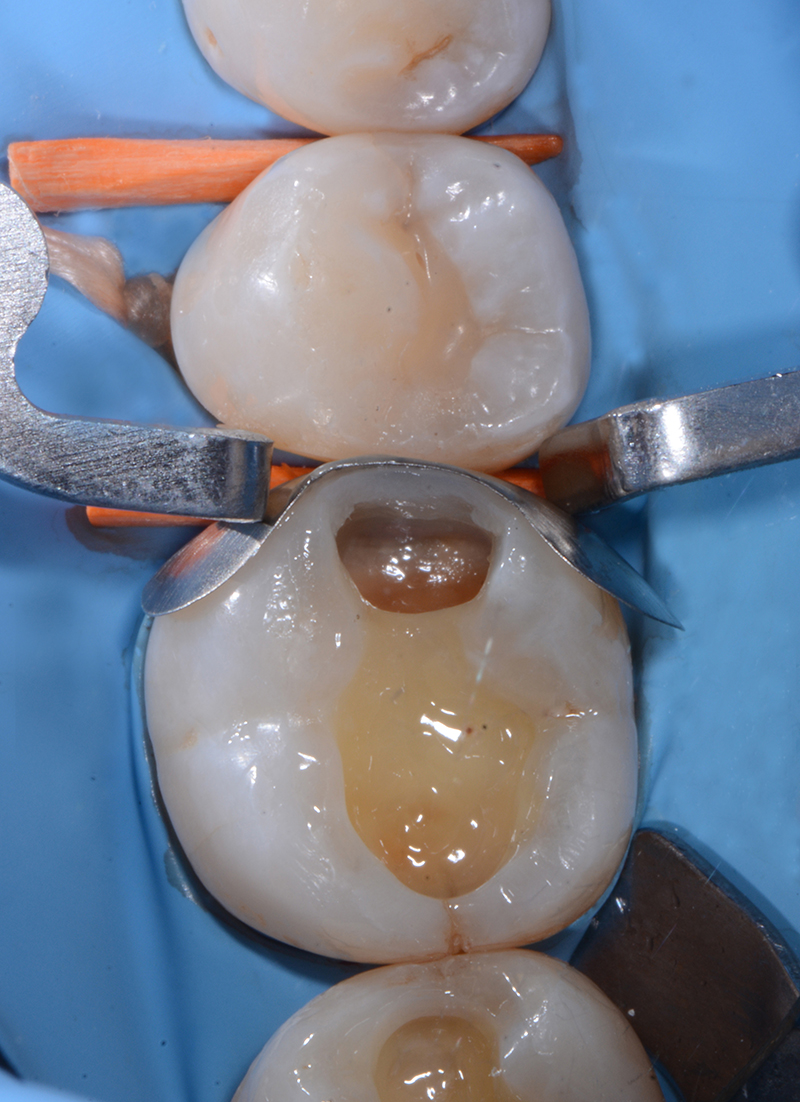
After finishing the cavity, the enamel surface was etched with phosphoric acid gel (Ultra-Etch etchant, Ultradent Products) for 30 seconds (Fig. 10). The dentine was etched for 15 seconds (Fig. 11).
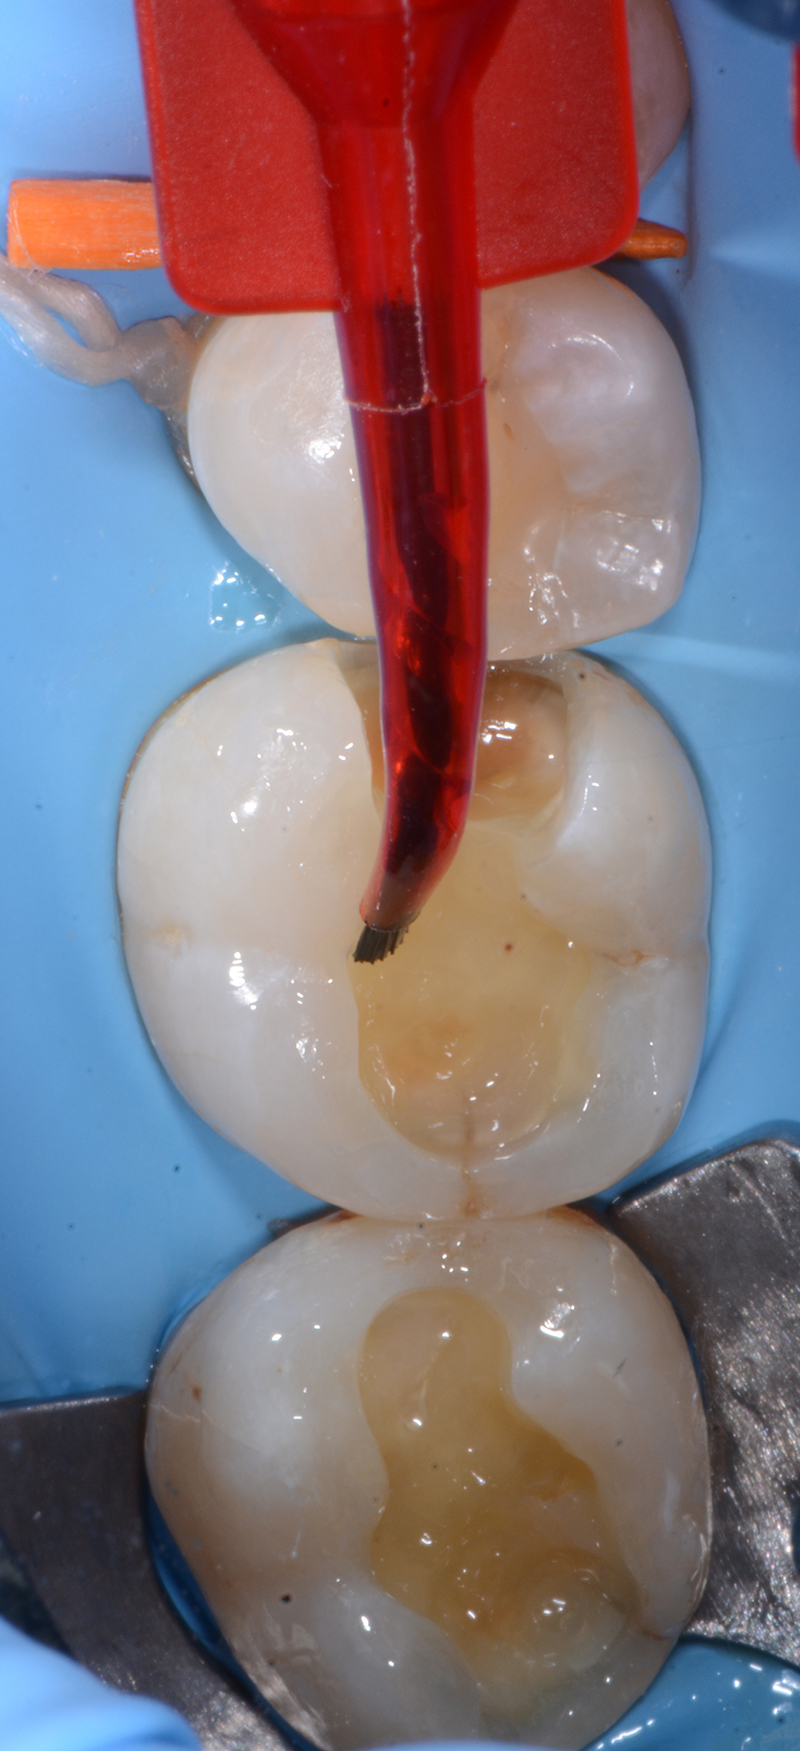
A thorough rinsing with water removed the etching acid and inactivated the demineralization process. Then the adhesive system Peak Universal Bond adhesive, containing chlorhexidine, was applied for 20 seconds (Fig. 12). It was carefully dried afterwards in order to evaporate the solvent and then re-applied again to ensure an appropriate impregnation of the dentinal substrate, exposed by the acid etching process.
The use of this adhesive system is backed by numerous scientific reports, according to which chlorhexidine could fix the adhesive bond over time, acting as an inhibitor of enzymes which in turn is capable of destabilizing the dentinal collagen fibrils.
The adhesive then was accurately cured for 20 seconds with a high power LED light (VALO curing light, Ultradent Products) to ensure the maximum conversion of the adhesive monomers (Fig. 13).
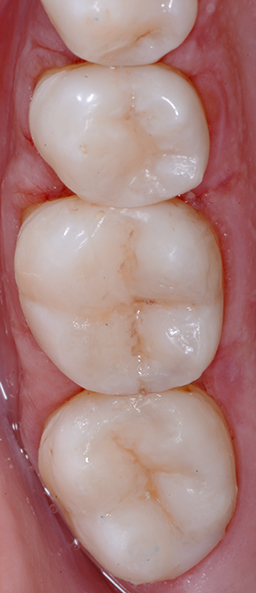
The cavities were reconstructed with the latest generation of universal composites (Mosaic composite, Ultradent Products) in order to provide resistance towards chewing forces as well as highly aesthetic results.
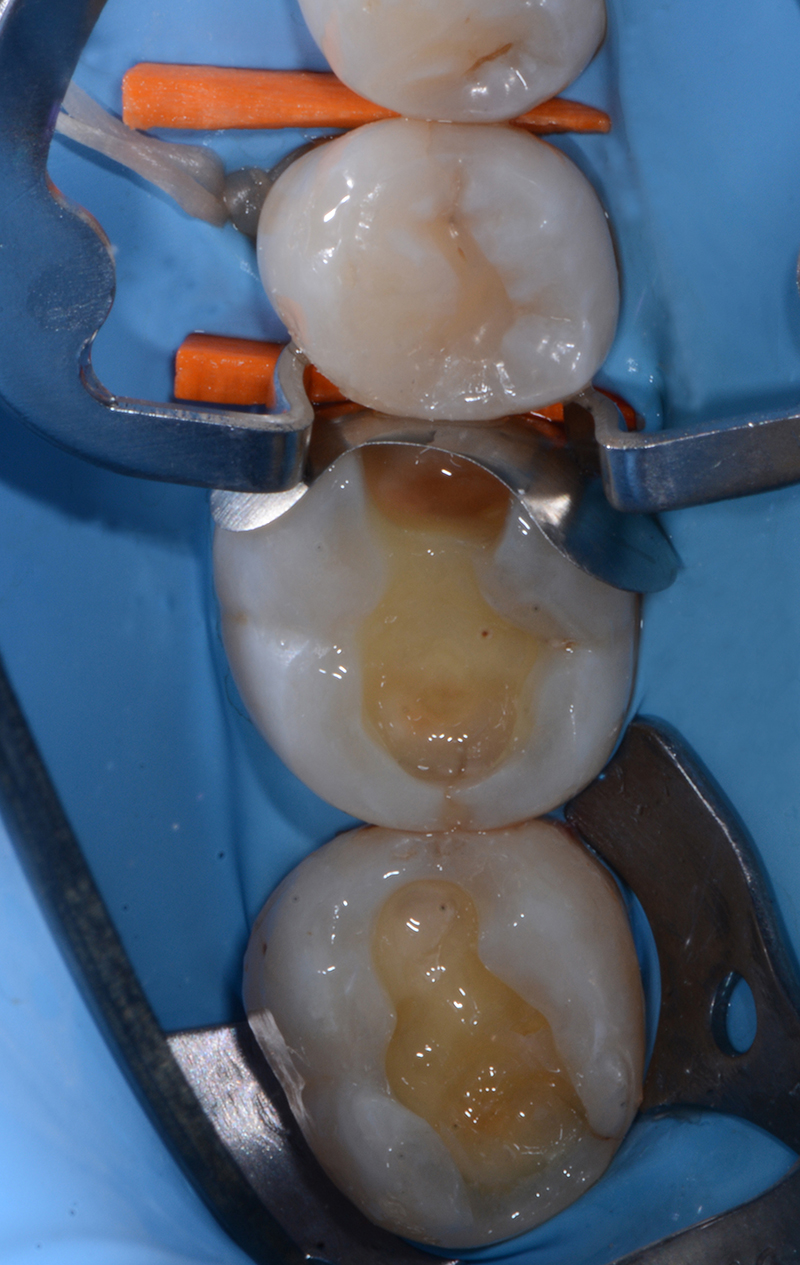
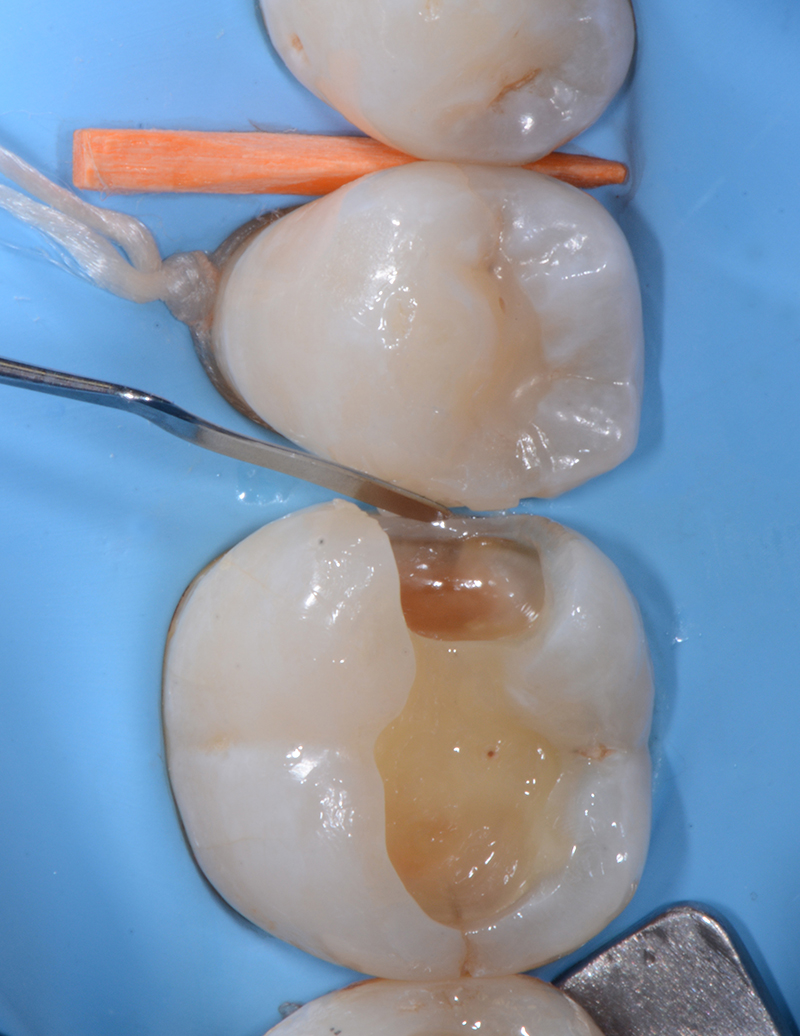
Firstly, the tunnel cavity of the distal element 4.5 was filled with small material increments (Mosaic A2 composite, Fig. 14).
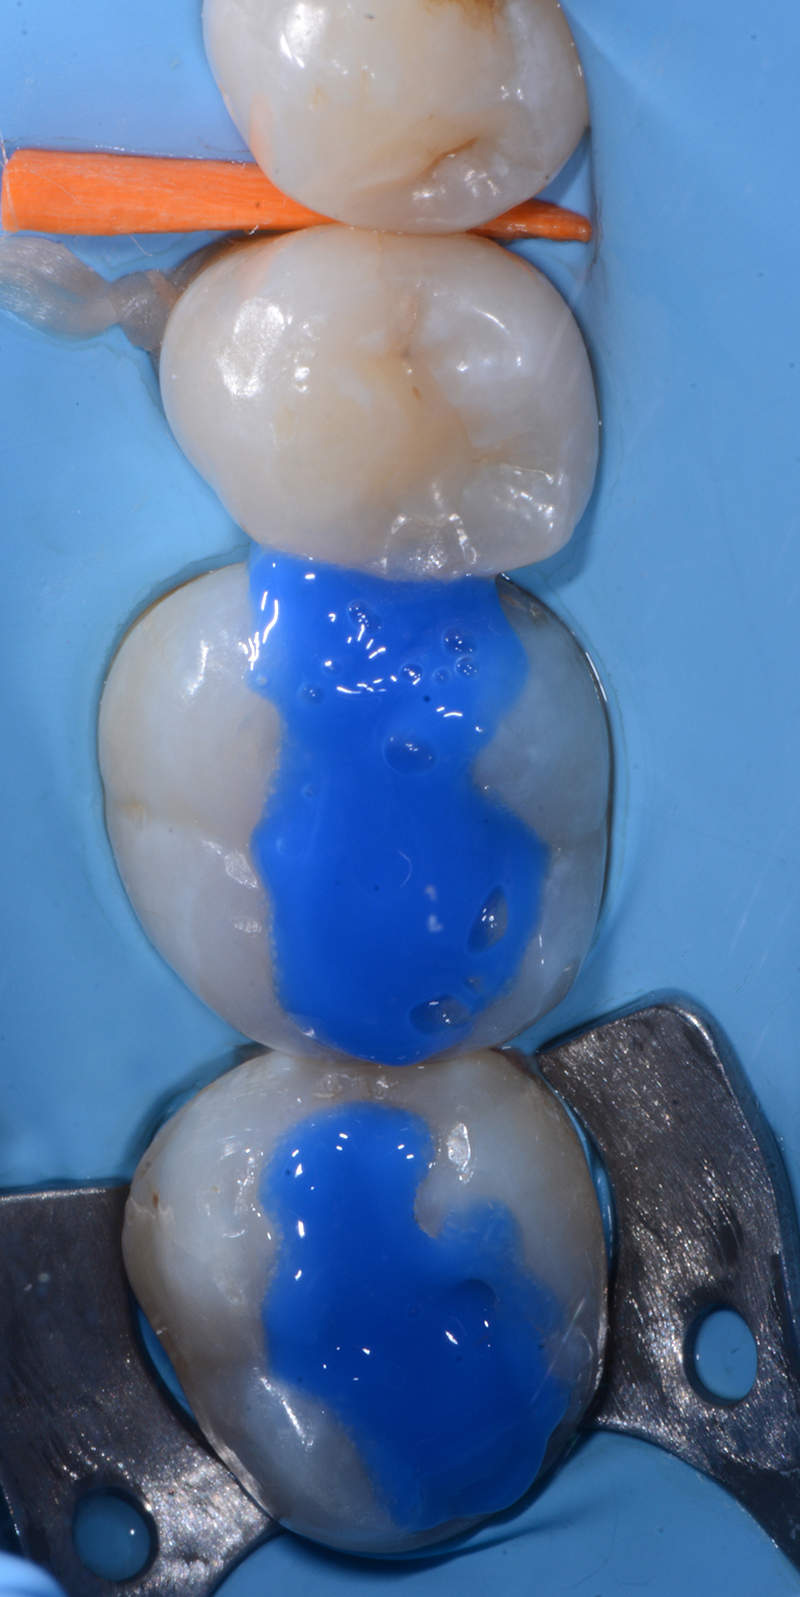
After the restoration of 4.5, a mesial sectional matrix was attached to element 4.6 to properly reconstruct the marginal areas (Mosaic A2 composite, Figs. 15 and 16). This is an essential prerequisite for the finalisation of the occlusal restoration surface (Mosaic A2 composite and Mosaic EW - Enamel White composite, Fig. 17).
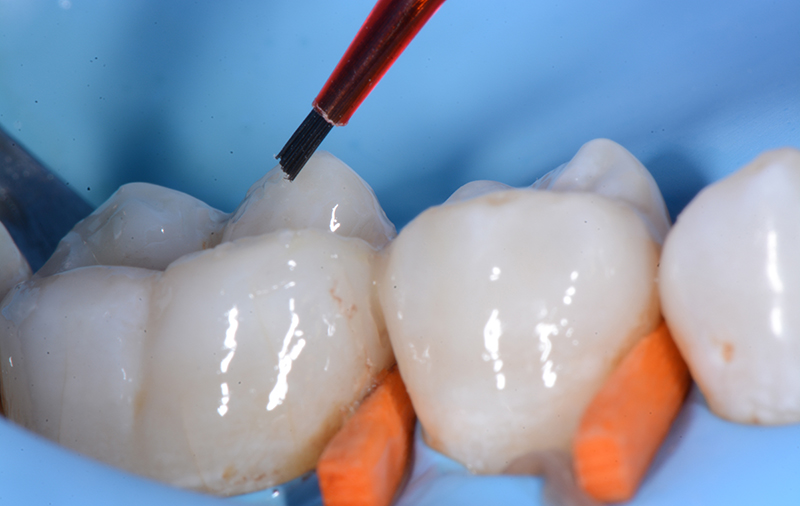
Peak Universal Bond adhesive can additionally be reapplied before the restoration is finished. This helps to seal any superficial porosity (re-sealing) and fill small marginal or surface insufficiencies of the restoration (fig.18) in order to guarantee a suitable hydrophobic "coating" over time.
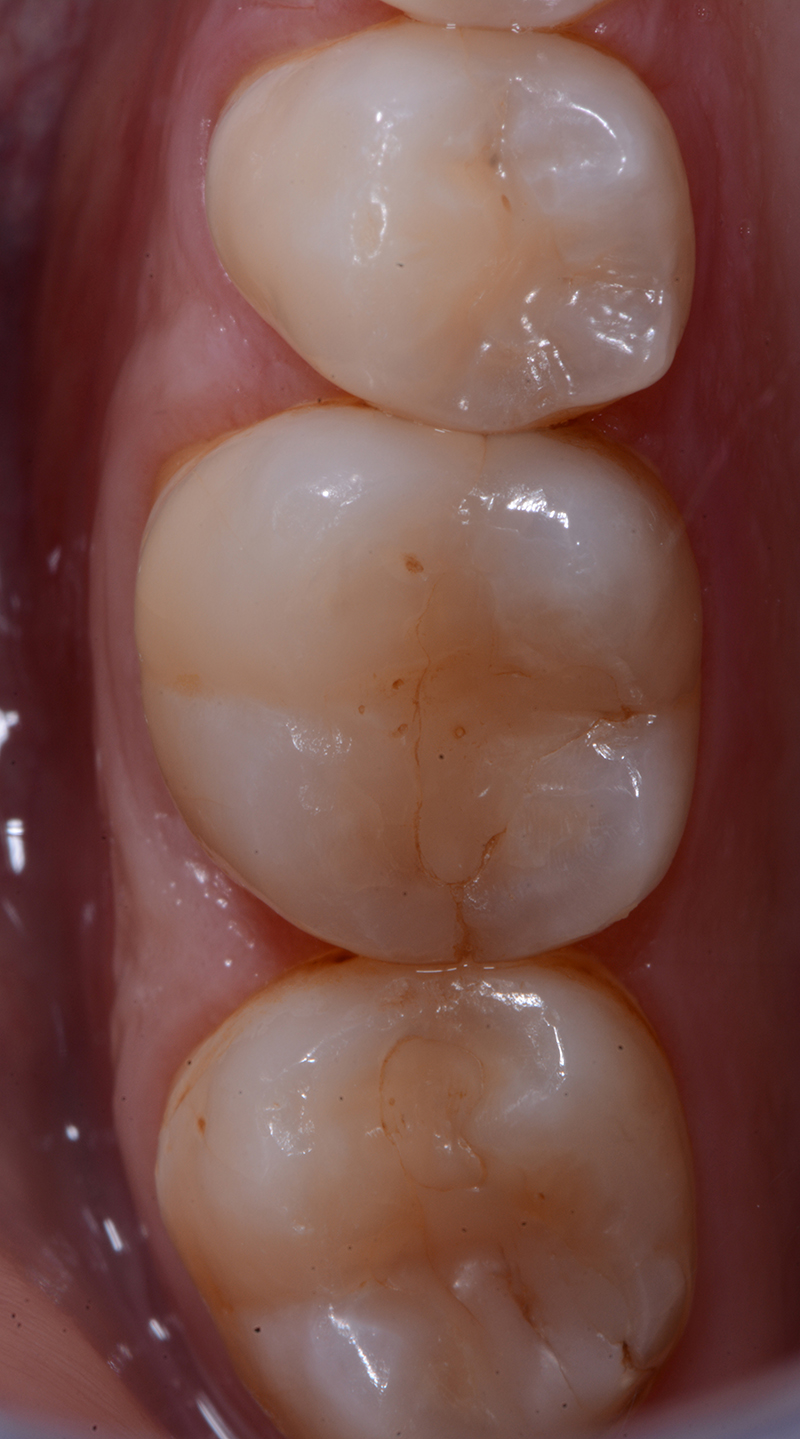
Figure 19 shows the final restoration. The rubber dam was removed before the final polishing.
About the authors
Gaetano Paolone:

Adjunct Professor of Restorative Dentistry, Università Vita Salute San Raffaele, Milan. Active Member of the AIC (Italian Academy of Conservative Dentistry) IAED (Italian Academy of Aesthetic Dentistry) and AIOM (Italian Academy of Microscopic Dentistry). Lecturer at the Master in Aesthetic Conservative Dentistry, Alma Mater University of Bologna. Lecturer at the Advanced Course in Aesthetic Dentistry, University of Tor Vergata, Rome. Author and co-author of scientific publications in national and international journals, as well as of some chapters in “Endo-Prosthodontics” and “Moderna Odontoiatria Estetica”. “Workflows from A to Z” published by Quintessence International.
Lorenzo Breschi:

Professor of Conservative Dentistry at the Department of Biomedical and Neuromotorical Sciences, Alma Mater University of Bologna. Director of the Master in Aesthetic Conservative Dentistry, Alma Mater University of Bologna. President of the European Federation of Conservative Dentistry. President of AIC (Italian Conservation Academy). Former President of ADM (Academy of Dental Materials) and DMG-IADR (Dental Materials Group -International Association of Dental Research). Associate Editor of the “Journal of Adhesive Dentistry” and author of more than 300 scientific publications in international journals.
First published: Dental Cadmos – Edra Spa, 5/2017, Italy